Supported Devices
| Device Type | Modbus TCP (Ethernet) | RS485 | MQTT |
|---|---|---|---|
| Smappee energy meters with MQTT | ❌ | ❌ | ✅ |

Configuration
Smappee should communicate through MQTT to the database. This database is then used as a source for the Smappee data.
Documentation about Smappee MQTT can be found in the attached document from Smappee: Download the PDF.
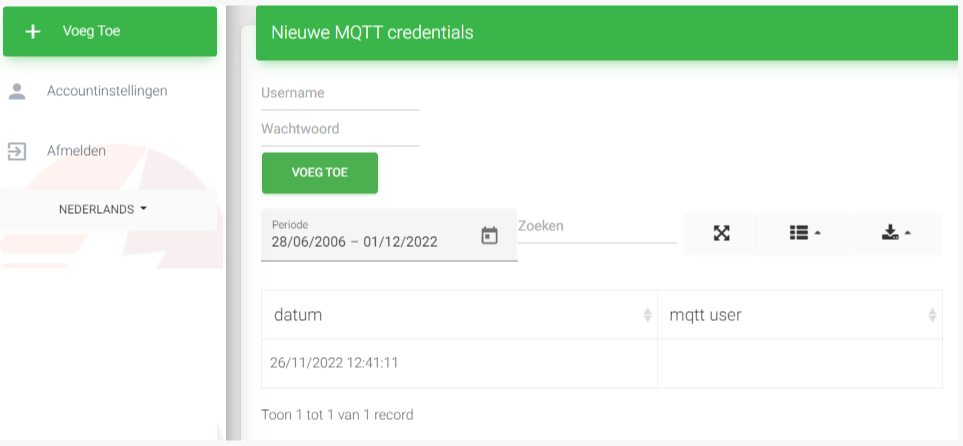
1. Creating MQTT credentials
The MQTT credentials that are required in the Smappee configuration will be made in this step. Note: Creating MQTT credentials is currently only available on insights2 so you will need to navigate to https://insights.eniris.be
- Click on global settings
- Select Credentials & Licenses in the top menu
- Select Add Credentials
- The username should be in the format yourcompanyname-index (e.g. eniris-0).

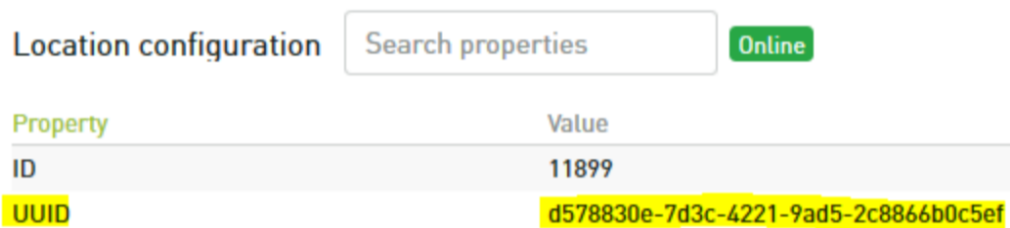
2. Get the Smappee UUID
The Smappee UUID is an important link to the correct Smappee location.
Obtain it through:
- Dashboard:
- go to https://dashboard.smappee.net
- add a Location configuration card
- REST API call:
- MQTT wildcard:
- Match the Configuration Topic results to the serial number you need, see https://www.hivemq.com/blog/mqtt-essentials-part-5-mqtt-topics-best-practices
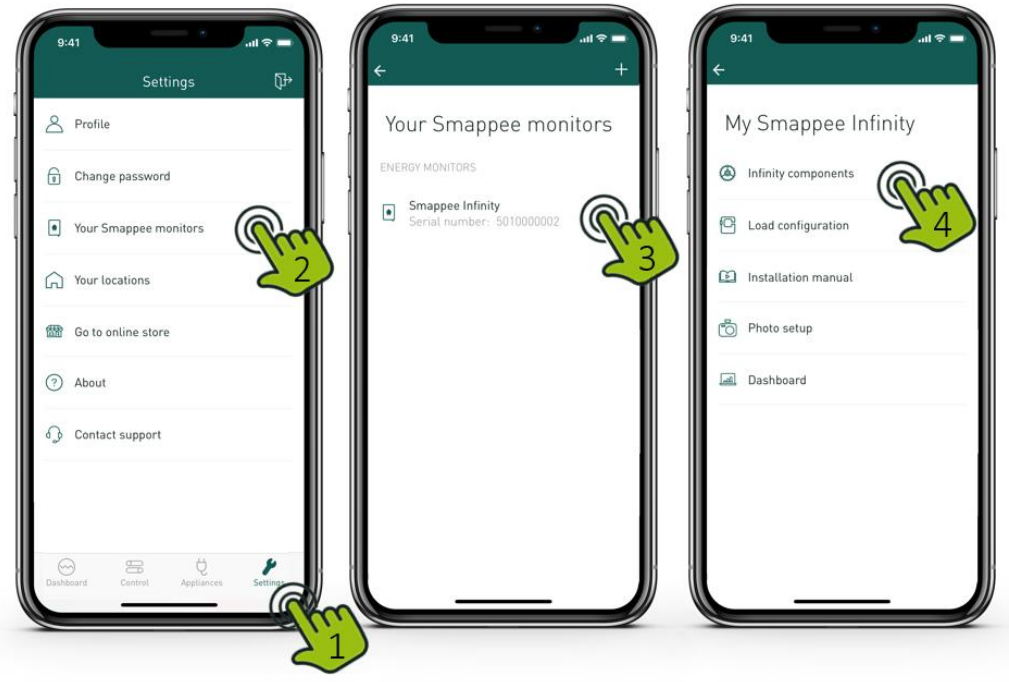
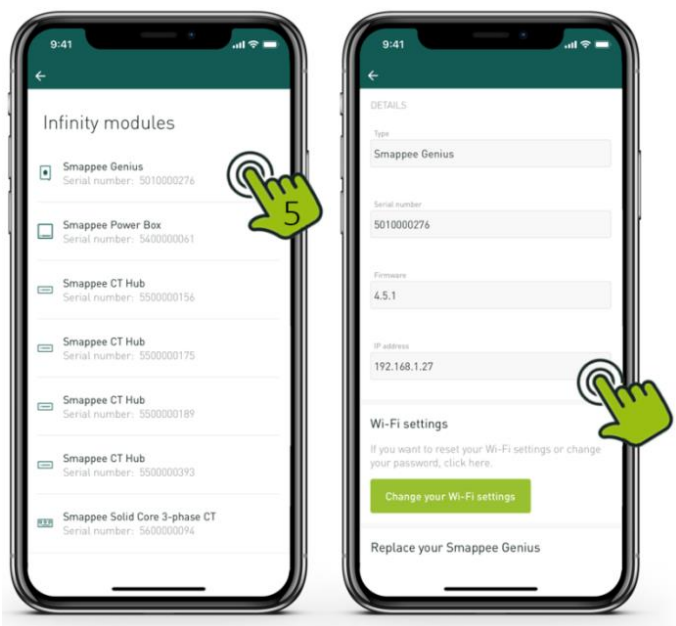
3. Get the Smappee IP address
- Open the Smappee APP
- Go to Settings
- Click Your Smappee monitors
- Click Smappee Infinity
- Click Infinity Components
- Click Smappee Genius
- Find the IP-address in the details
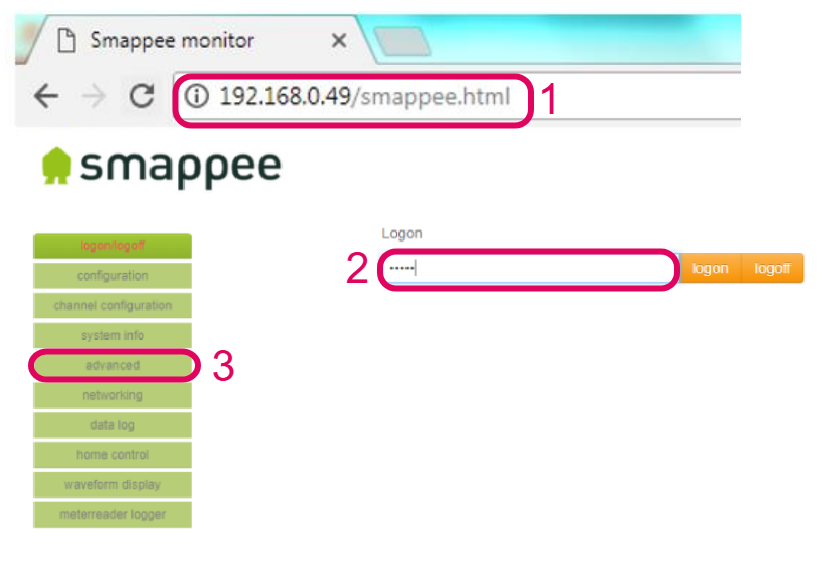
4. Configuring the MQTT broker in the Smappee Energy Meter
- Navigate to the in the previous step determined IP of your Smappee monitor followed by /smappee.html . Example: 192.168.0.128/smappee.html
- Click Logon/logoff and log in
- Click advanced
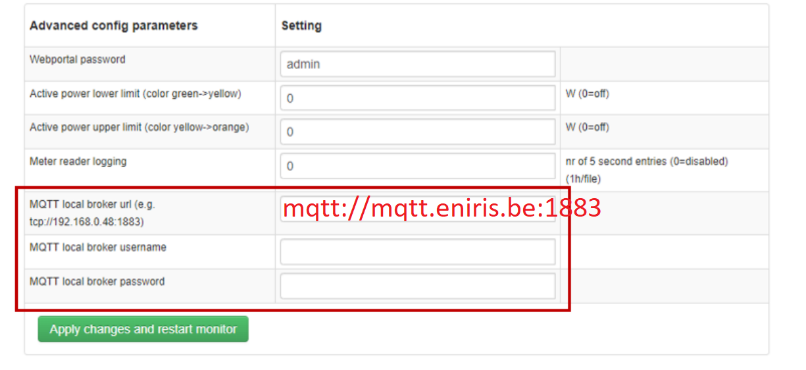
- Fill in the MQTT local broker url: mqtt://mqtt.eniris.be:1883
- Fill in the MQTT username and password using the credentials you created in the previous step
- Click apply changes and restart monitor
5. Configuration in the Sofar EMS
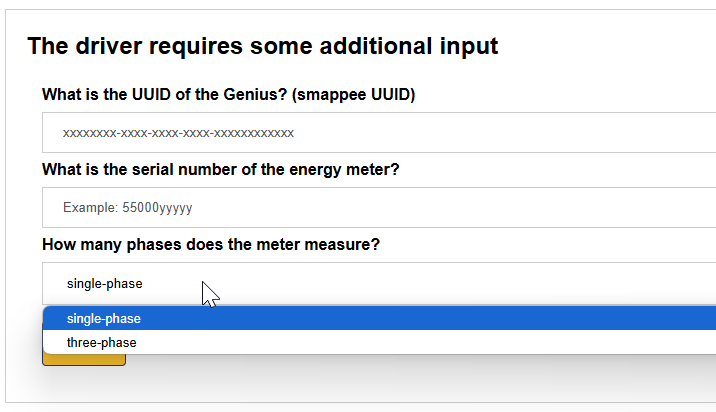
Add the device in the Sofar EMS. When asked for, enter the:
- UUID
- serial number of the meter
- number of phases that are measured