Distributor & DHCP network
If you purchased the dS1242 Ethernet relay module through your distributor, it will be preconfigured.
In networks where DHCP is used, you do not need to do anything. Just connect the module to Ethernet and connect the power adaptor.
Connect the relays as needed for the device you will use them to control.
Purchased the module elsewhere or you are using it on a network with fixed IP addresses
Connecting the dS1242 Ethernet Ethernet-Relay module
To connect a dS1242 you'll need to first check if there is a firmware version running on it. Connect an ethernet cable connected to your network and the 12V power supply to the module. Check if the blue LED flashes 3 times. If it does not, you should install firmware on the module first. Therefore continue to the firmware update. If it does flash 3 times, you need to check if the communication is set correctly. Go to set the control to modbus.

Updating the firmware
You'll need a PC and a mini-USB to USB cable to install and use the program to do the update of the firmware.
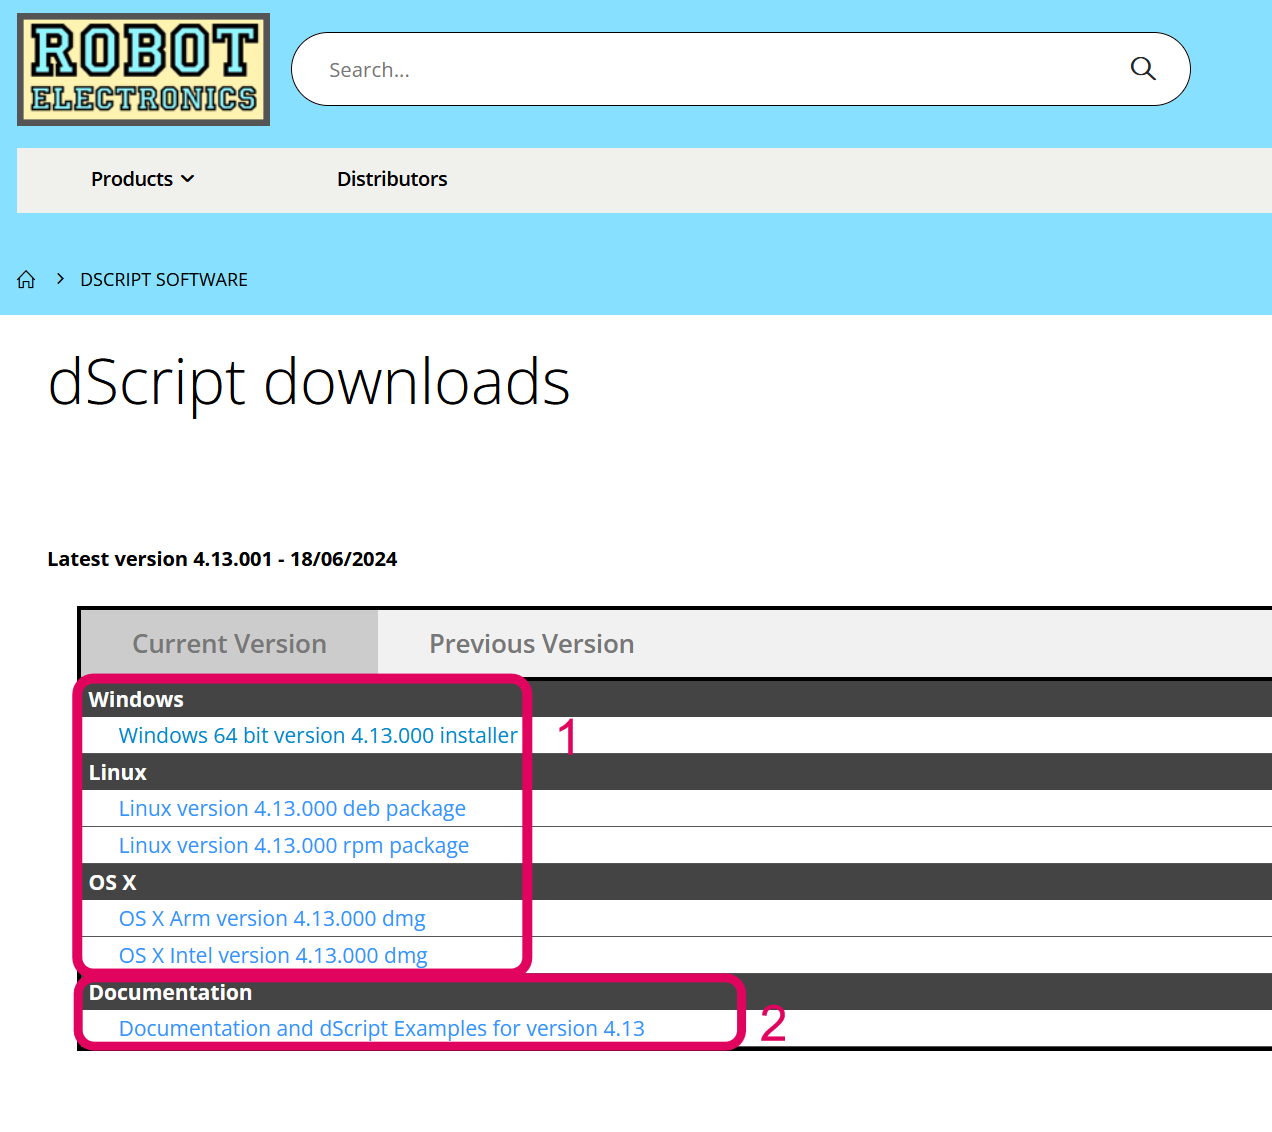
Please go to the following link:
Select the applicable version of dScript (see 1 on the figure). Download it and install it. If you already have a version make sure you have the latest version.
After this, download the Documentation and dScript Examples zip file (see 2 on the figure). Extract all data and remember the folder location.
Before continuing please make sure that:
-
dScript Editor closed down.
-
dS1242 not connected or powered.
Continue by preparing the module as followed:
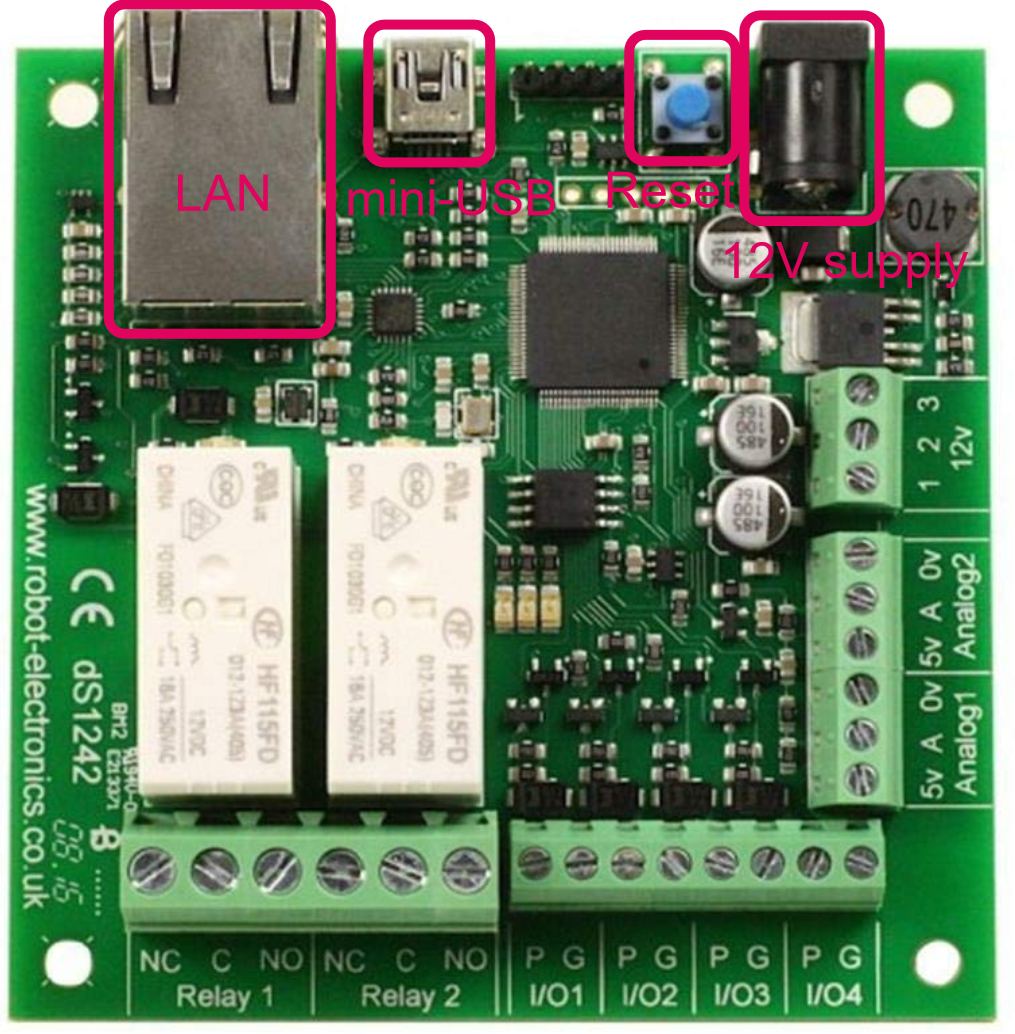
- Power-up the dS1242.
- Hold down the blue reset button for a couple of seconds until the red LED comes on (this indicates the module is in boot-loader mode).
- Connect the USB-mini lead to the PC.
Update the firmware with dScript
-
Run the dScript editor.
-
Now look in the Module panel, you should see: ds1242 vX.XX indicates it's the boot-loader that is running.
-
Load the project: File -> Open project 'yourFolder'\dScriptPublish\Examples\app-dS1242-vx-xx\app-dS1242-vx-xx.dsj
Substitute the path 'yourFolder' for where you placed the dScriptPublish folder.
-
Click the build button (white triangle on green button). This will update the system firmware and load the application.
-
When done, the new version will be displayed.

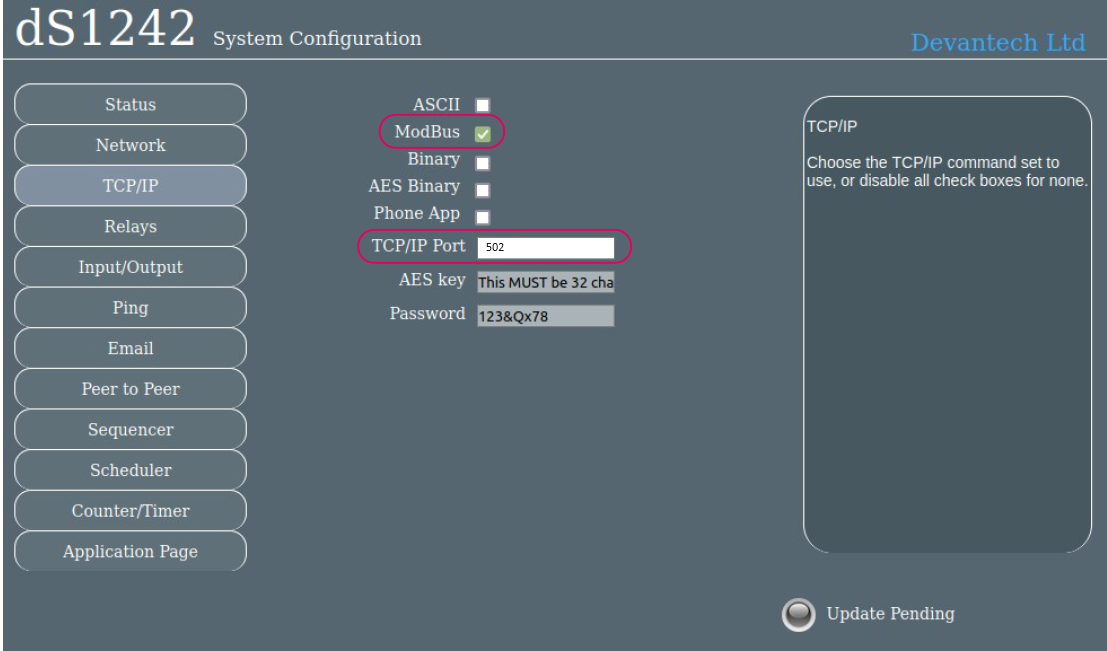
Set the control to modbus
In order to set the control to modbus, you have to:
-
Connect the power supply and the ethernet cable (linked to your network)
-
Connect the dS1242 mini-USB to 5V DC power supply (for example a pc USB port)
-
Search for the IP-address in the network (mac-address starts with 60:8A:10:xx:xx:xx, D8:80:39:xx:xx:xx) or
-
Go to the following URL: "IP-address/_config.htm"
-
In the tab TCP/IP, modify as shown in the top image
Note
This can be prepared on beforehand