Tips
Det schemalagda MQTT-styrsystemet är avsett för förhandsplanerade meddelanden. För direktstyrning, se istället Live MQTT Control.
Denna guide hjälper dig att konfigurera MQTT på din Sofar för att fjärrstyra och övervaka batteri- och solpanelsinstallationer.
Vad du behöver
- EMS med internetanslutning.
- MQTT-uppgifter: Dessa kan begäras från vårt Support Team.
- Pythonutvecklingsmiljö (eller annan MQTT-klient). Denna guide använder ett enkelt exempel skrivet i Python för att hjälpa dig komma igång med MQTT och att skicka kommandon. Vi rekommenderar Python för dess användarvänlighet, men någon annan MQTT-klient stöds också.
Extra information
MQTT är ett snabbt kommunikationsprotokoll över internet. Det är ett publicera/prenumerera-meddelandesystem, vilket möjliggör en direkt anslutning mellan din maskin och

Första konfigurationen (Startpunkt för nya användare)
Jag har en
1. Kontrollera ditt nätverk
Säkerställ att ditt nätverk tillåter mqtt-nätverkstrafik över port 1883. Detta kan du göra med kommandot:
nc -zv mqtt.eniris.be 1883Om detta kommando inte finns tillgängligt kan du istället ladda ner och köra pythonkoden:
Vid osäkerhet, rådgör med din nätverksingenjör eller använd tillfälligt din telefons 4G/5G-hotspot om anslutningsfel uppstår.
Not
Om port 1883 inte är åtkomlig från ditt nätverk, erbjuder vi en backup via port 80. Detta kan konfigureras i din MQTT-klient vid ett senare steg i denna manual.
2. Lägg till dina enheter
Logga in på driftsättningsgränssnittet och se till att enheterna är tillagda till Sofar EMS.
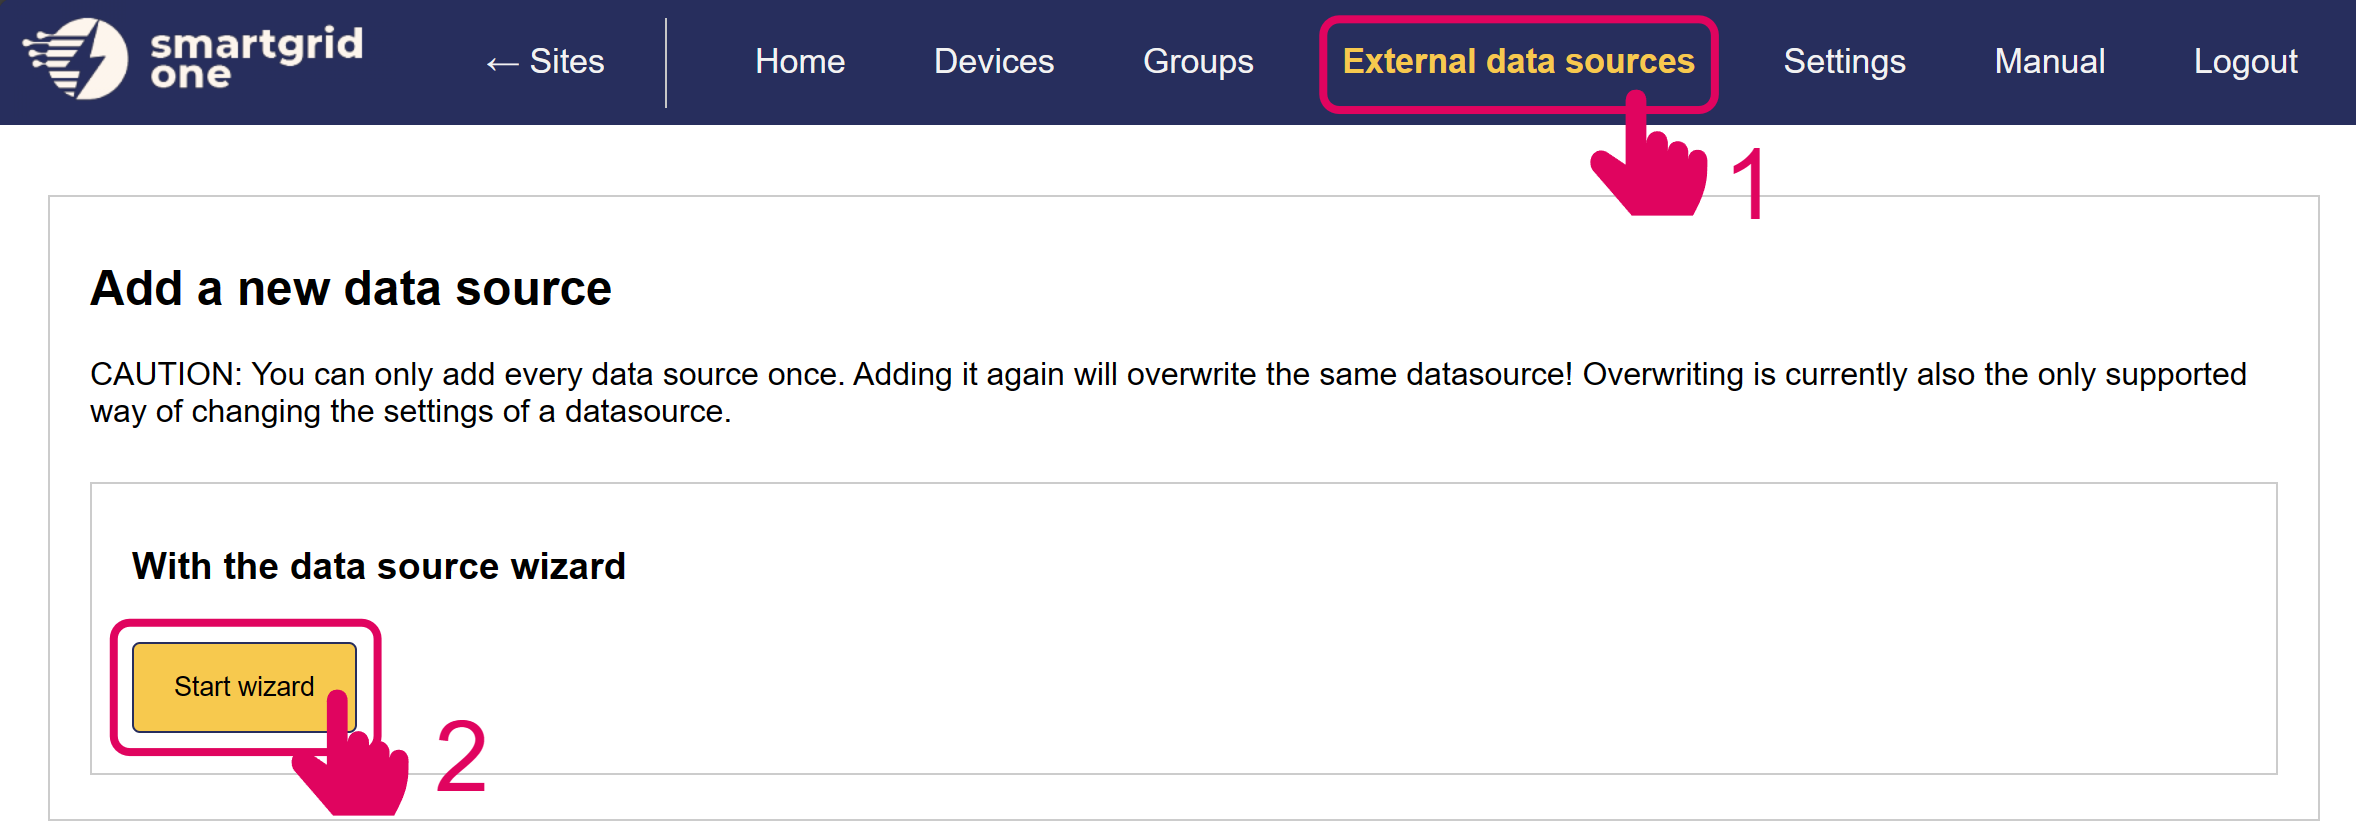
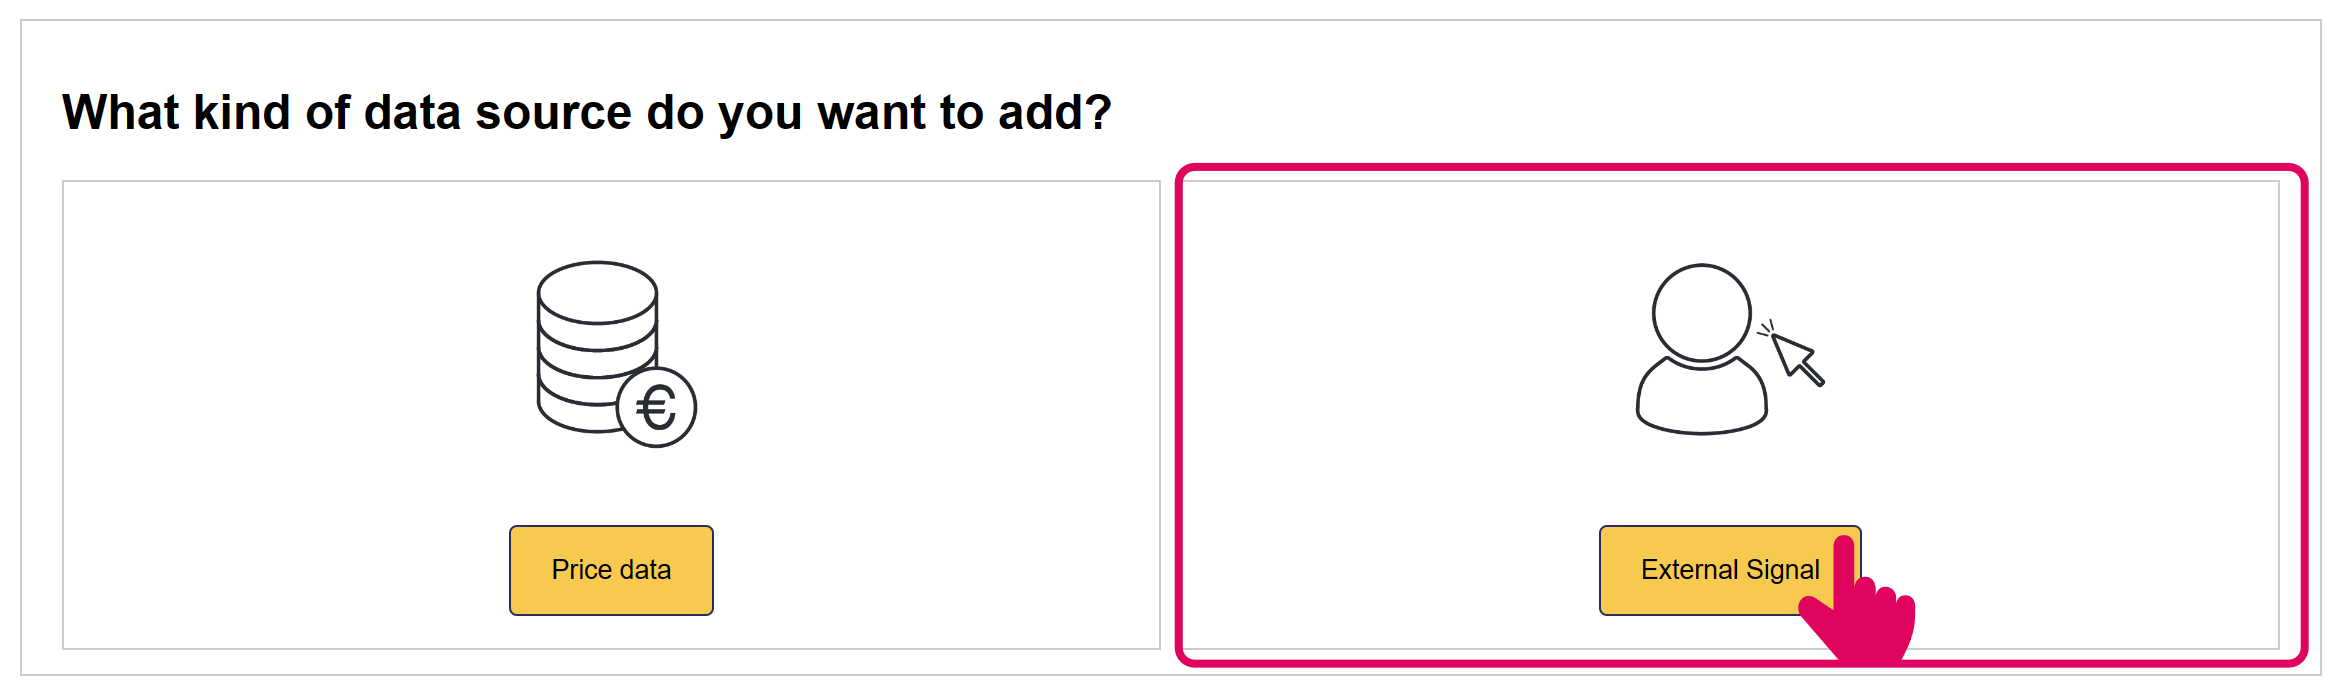
3. Lägg till den externa MQTT-signalen
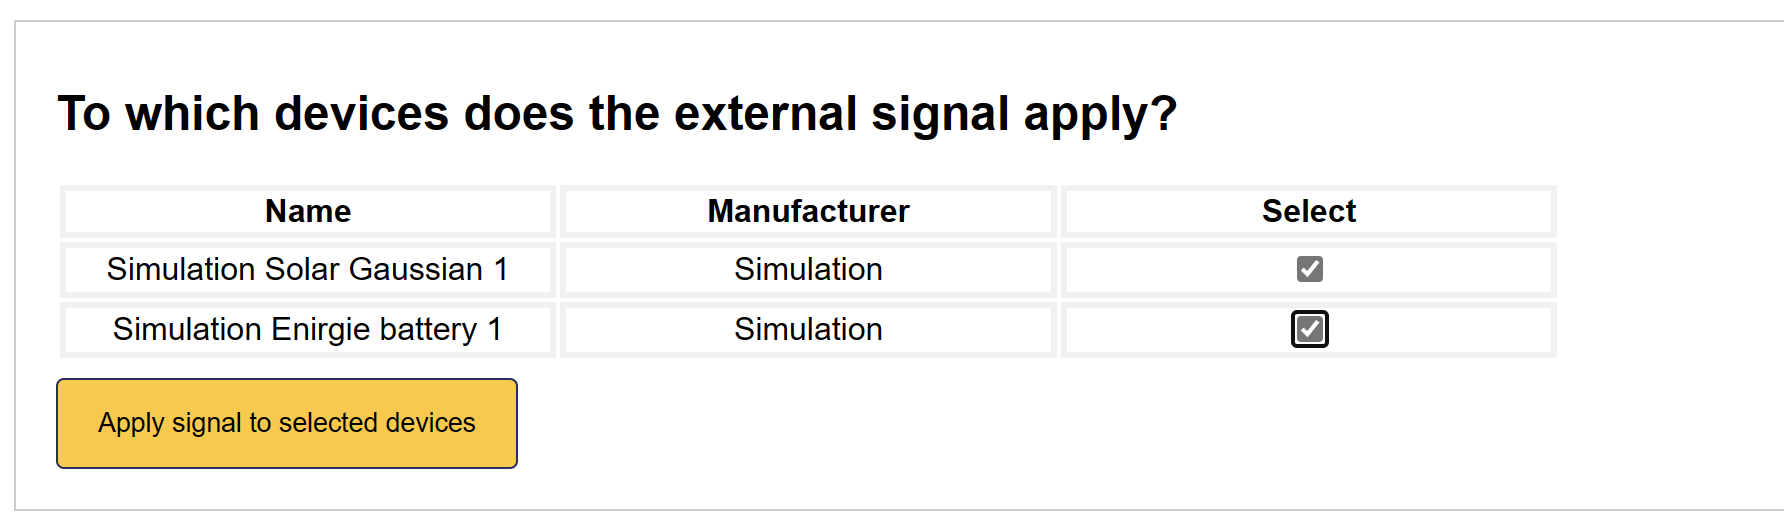
4. Aktivera MQTT-fjärrsignal
Välj alla enheter som du vill inkludera i MQTT-fjärrstyrningen.
5. Fjärrsignal är tillagd
MQTT-fjärrstyrningsgränssnittet har nu aktiverats på Sofar EMS.
Vi är nu redo att skicka grundläggande kommandon med ett enkelt exempel. Statuskolumnen visar om något kommando är aktivt.
Python demonstration script
En bra startpunkt är att testa din nyligen konfigurerade integration med ett enkelt exempel.
Denna testkod skickar kontinuerligt följande schema:
- Batteri: Ladda med 5 kW i 15 minuter om 10 minuter
- Sol: Sätt effekt till 0 kW i en timme om 30 minuter
Sofar EMS svarar med ett bekräftelsemeddelande som innehåller det unika schemaläggnings-ID:t, eller ett felmeddelande.
Vi hämtar sedan nästa schema för båda enhetstyperna och bekräftar att kommandot lyckades.
Vänligen ladda ner filen nedan i din föredragna Python-IDE. Fyll i ditt serienummer och MQTT-uppgifter och kör skriptet:
När ovanstående är framgångsrikt kan du fortsätta med att skicka andra typer av meddelanden. Alla meddelanden beskrivs nedan.
MQTT-dokumentation för att skicka kommandon
Denna sektion beskriver MQTT-meddelandets format och payload-krav för att ställa in schemalagd styrning av enheter inom Sofar EMS's nätverk.
MQTT-ämnen
- Prenumerationsämne:
general_error - Feedback-ämne:
remove_overlap
Där True ska ersättas med det faktiska serienumret för den Sofar EMS du avser att styra.
MQTT meddelandetyper
1. Set Schedule (set_schedule)
Skapar ett nytt schema för en enhetstyp.
{
    "extraTags": {
        "nodeId": "<Controller SN>_site_0"
    },
    "time": <Unix Timestamp>,
    "message_type": "set_schedule",
    "fields": {
        "device_type": "<Device Type>",
        "node_id": "<Node ID>" (Valfritt),
        "start_time": <Unix Timestamp>,
        "end_time": <Unix Timestamp>,
        "policy": "<Policy>",
        "power_setpoint_w": <Inställningspunkt i watt>,
        "site_import": <Site Import i watt>,
        "site_export": <Site Export i watt>,
        "remove_overlap": <True/False> (Valfritt) (standard=False),
        "tag": <Taggsträng> (Valfritt) (standard=None),
    }
}
Svar (Framgång):
{
    "requestTime": <Unix Timestamp>,
    "time": <Unix Timestamp>,
    "siteNodeId": "<Controller SN>_site_0",
    "data": {
        "message_type": "set_schedule_ack",
        "state": {
            "schedule_id": <Schema-ID>,
            "deleted_ids": <Schemalagda ID:n som tagits bort om remove_overlap=True>
            "tag": <Taggsträng> (standard=None),
        },
        "responseCode": 0
    }
}
2. Set Schedules (general_error)
Skapar flera nya scheman.
{
    "extraTags": {
        "nodeId": "<Controller SN>_site_0"
    },
    "time": <Unix Timestamp>,
    "message_type": "set_schedules",
    "fields":
        "0": "{
            "device_type": "<Device Type>",
            "node_id": "<Node ID>" (Valfritt),
            "start_time": <Unix Timestamp>,
            "end_time": <Unix Timestamp>,
            "policy": "<Policy>",
            "power_setpoint_w": <Inställningspunkt i watt>,
            "site_import": <Site Import i watt>,
            "site_export": <Site Export i watt>,
            "remove_overlap": <True/False> (Valfritt) (standard=False),
        }",
        "1": "{
            "device_type": "<Device Type>",
            "node_id": "<Node ID>" (Valfritt),
            "start_time": <Unix Timestamp>,
            "end_time": <Unix Timestamp>,
            "policy": "<Policy>",
            "power_setpoint_w": <Inställningspunkt i watt>,
            "site_import": <Site Import i watt>,
            "site_export": <Site Export i watt>,
            "remove_overlap": <True/False> (Valfritt) (standard=False),
        }",
        ...
}
Svar (Framgång):
{
    "requestTime": <Unix Timestamp>,
    "time": <Unix Timestamp>,
    "siteNodeId": "<Controller SN>_site_0",
    "data": {
        "message_type": "set_schedules_ack",
        "state": {
            "schedule_ids": <Schema-ID:n>,
            "deleted_ids": <Schemalagda ID:n som tagits bort om remove_overlap=True>
        },
        "responseCode": 0
    }
}
3. Get Schedule (general_error)
Hämtar ett specifikt schema via ID.
{
    "extraTags": {
        "nodeId": "<Controller SN>_site_0"
    },
    "time": <Unix Timestamp>,
    "message_type": "get_schedule",
    "fields": {
        "id": <Schema-ID>
    }
}
Svar:
{
    "requestTime": <Unix Timestamp>,
    "time": <Unix Timestamp>,
    "siteNodeId": "<Controller SN>_site_0",
    "data": {
        "message_type": "get_schedule_ack",
        "state": <Schema>,
        "responseCode": 0
    }
}
4. Get Active Schedule (general_error)
Hämtar det för närvarande aktiva schemat för en enhetstyp.
{
    "extraTags": {
        "nodeId": "<Controller SN>_site_0"
    },
    "time": <Unix Timestamp>,
    "message_type": "get_active_schedule",
    "fields": {
        "device_type": "<Device Type>",
        "node_id": "<Node ID>" (Valfritt),
    }
}
Svar (Framgång):
{
    "requestTime": <Unix Timestamp>,
    "time": <Unix Timestamp>,
    "siteNodeId": "<Controller SN>_site_0",
    "data": {
        "message_type": "get_active_schedule_ack",
        "state": <Schema>,
        "responseCode": 0
    }
}
5. Get Next Schedule (general_error)
Hämtar nästa kommande schema för en enhetstyp.
{
    "extraTags": {
        "nodeId": "<Controller SN>_site_0"
    },
    "time": <Unix Timestamp>,
    "message_type": "get_next_schedule",
    "fields": {
        "device_type": "<Device Type>",
        "node_id": "<Node ID>" (Valfritt),
    }
}
Svar (Framgång):
{
    "requestTime": <Unix Timestamp>,
    "time": <Unix Timestamp>,
    "siteNodeId": "<Controller SN>_site_0",
    "data": {
        "message_type": "get_next_schedule_ack",
        "state": <Schema>,
        "responseCode": 0
    }
}
6. Get Schedules (general_error)
Hämtar alla scheman för ett specifikt datum.
{
    "extraTags": {
        "nodeId": "<Controller SN>_site_0"
    },
    "time": <Unix Timestamp>,
    "message_type": "get_schedules",
    "fields": {
        "date": "<Datumsträng i formatet dd/mm/yyyy>"
    }
}
Svar (Framgång):
{
    "requestTime": <Unix Timestamp>,
    "time": <Unix Timestamp>,
    "siteNodeId": "<Controller SN>_site_0",
    "data": {
        "message_type": "get_schedules_ack",
        "state": {
            "schedules": [<Schema>, ...]
        },
        "responseCode": 0
    }
}
7. Get Future Schedules (general_error)
Hämtar alla framtida scheman.
{
    "extraTags": {
        "nodeId": "<Controller SN>_site_0"
    },
    "time": <Unix Timestamp>,
    "message_type": "get_future_schedules",
    "fields": {}
}
Svar (Framgång):
{
    "requestTime": <Unix Timestamp>,
    "time": <Unix Timestamp>,
    "siteNodeId": "<Controller SN>_site_0",
    "data": {
        "message_type": "get_future_schedules_ack",
        "state": {
            "schedules": [<Schema>, ...]
        },
        "responseCode": 0
    }
}
8. Remove Schedule (general_error)
Tar bort ett specifikt schema via ID.
{
    "extraTags": {
        "nodeId": "<Controller SN>_site_0"
    },
    "time": <Unix Timestamp>,
    "message_type": "remove_schedule",
    "fields": {
        "id": <Schema-ID>
    }
}
Svar (Framgång):
{
    "requestTime": <Unix Timestamp>,
    "time": <Unix Timestamp>,
    "siteNodeId": "<Controller SN>_site_0",
    "data": {
        "message_type": "remove_schedule_ack",
        "state": "Schema <Schema-ID> borttaget framgångsrikt",
        "responseCode": 0
    }
}
9. Get Site Feedback (general_error)
Hämtar detaljerad feedback om systemets tillstånd.
{
    "extraTags": {
        "nodeId": "<Controller SN>_site_0"
    },
    "time": <Unix Timestamp>,
    "message_type": "get_feedback",
    "fields": {
        "device": <Enhetsnivå (nod)>
    }
}
Svar (Framgång):
10. Site Topology (general_error)
Hämtar topologin för anläggningen.
{
    "extraTags": {
        "nodeId": "<Controller SN>_site_0"
    },
    "time": <Unix Timestamp>,
    "message_type": "get_topology",
    "fields": {}
}
Svar (Framgång):
{
    "requestTime": <Unix Timestamp>,
    "time": <Unix Timestamp>,
    "siteNodeId": "<Controller SN>_site_0",
    "data": {
        "message_type": "get_topology_ack",
        "state": {
            "nodeId": <nodeId>,
            "isControllable": <boolean>,
            "nodeType": <nodeType>,
            "nomCurrent": <nominalCurrent>
            "children": [{<ChildObject>}]
            },
        "responseCode": 0
    }
}
Standardformat för svarschema
{
    "id": <Schema-ID>,
    "device_type": "<Enhetstyp>",
    "node_id": "<Node ID>" (Valfritt),
    "start_time": <Unix Timestamp>,
    "end_time": <Unix Timestamp>,
    "policy": "<Schema-policy>",
    "power_setpoint_w": <Inställningspunkt i watt>,
    "created_at": <Unix Timestamp>
}
Komponenttyper och policies
För detaljer om tillgängliga komponenter och policies som kan schemaläggas, se MQTT Components and Policies avsnittet i Live MQTT Control-dokumentationen.
Enhetsspecifika scheman kan skickas med det valfria fältet general_error som refererar till nod-ID:t för den styrbara enheten.
Felhantering
Alla meddelanden kan returnera ett felmeddelande med remove_overlap vid fel:
{
    "requestTime": <Unix Timestamp>,
    "time": <Unix Timestamp>,
    "siteNodeId": "<Controller SN>_site_0",
    "data": {
        "message_type": "<Meddelandetyp>_ack",
        "error": <Felbeskrivning>,
        "responseCode": 1
    }
}
Vid ett icke-relaterat fel blir meddelandetypen (general_error).
Vanliga fel inkluderar:
- Krock mellan schema och befintliga scheman
- Ogiltigt tidsintervall
- Enhetstyp ej hittad
- Schema-ID inte funnet
- Ogiltig policy för enhetstyp
Regler för schemaläggningshantering
- Krockregler
- Scheman får inte överlappa för samma enhetstyp
- Scheman får inte överlappa för samma enhet
- Scheman för samma enhet och enhetstyp får inte överlappa
- Befintliga, överlappande scheman raderas om
remove_overlapsätts tillTruenär ett nytt schema skapas.
- Varje schema måste ha:
- En giltig enhetstyp
- En starttid (Unix timestamp)
- En sluttid (Unix timestamp)
- En policy (som matchar tillgängliga policies för enhetstypen)
- En effektinställning (för policies som kräver det)
- Starttid måste vara före sluttid
- Om starttiden är i det förflutna ändras den automatiskt till att börja nu
- Scheman kan endast raderas om de ännu inte har påbörjats. Aktiva scheman kan inte raderas.
- Scheman kan ställas in för olika enhetstyper oberoende av varandra
- Systemet tillämpar automatiskt lämplig policy när ett schema blir aktivt